WebSocket Playground
Chanx includes a powerful WebSocket playground that provides a visual interface for exploring and testing WebSocket endpoints. This tool makes it easier to develop, debug, and document your WebSocket APIs.
Features
The WebSocket playground offers several key features:
Endpoint Discovery: Automatically discovers all available WebSocket endpoints
Interactive Connection: Connect to endpoints with customizable parameters
Message Composer: Create and send structured JSON messages
Message History: View all sent and received messages with syntax highlighting
Authentication Testing: Test endpoints with different authentication methods
Example Messages: Generate example messages based on your schema definitions
Enabling the Playground
To enable the WebSocket playground in your project:
Add 'chanx.playground' to your INSTALLED_APPS:
# settings.py
INSTALLED_APPS = [
    # ...
    'rest_framework',
    'channels',
    'chanx.playground',  # Add this for the WebSocket playground
    # ...
]
Add the playground URLs to your project's URL configuration:
# urls.py
from django.urls import path, include

urlpatterns = [
    # ...
    path('playground/', include('chanx.playground.urls')),
    # ...
]
Access the playground at
/playground/websocket/in your browser
Using the Playground
The playground interface is divided into several sections:
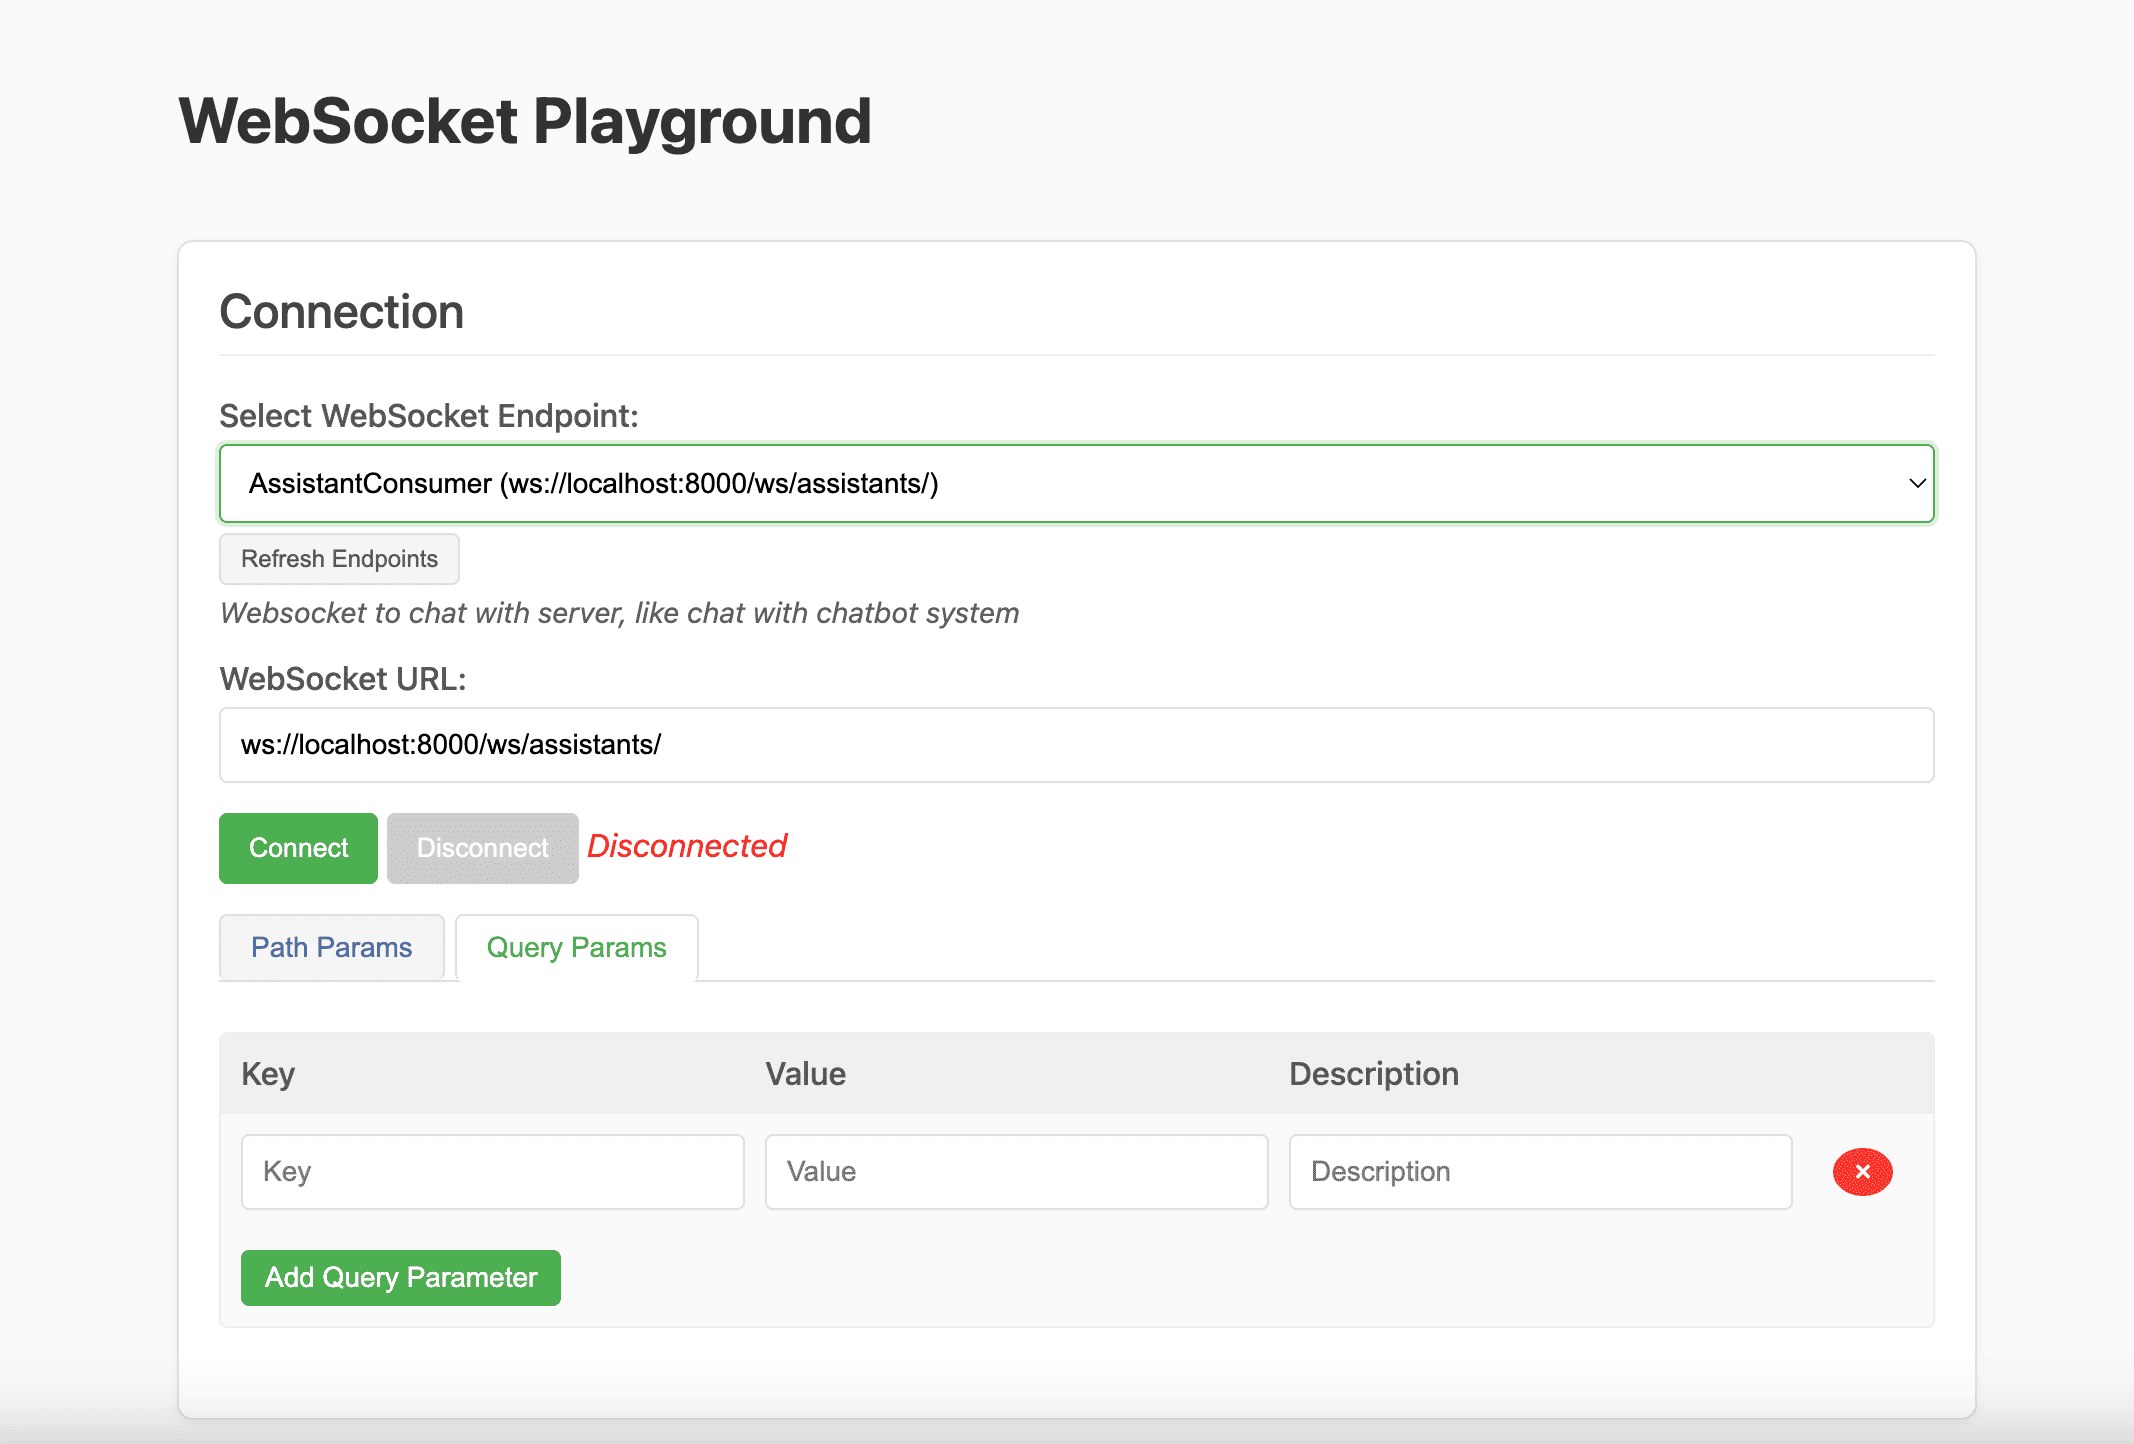
Endpoint Selection
The left panel displays all discovered WebSocket endpoints with their URLs and descriptions. Endpoints are automatically discovered from your URL routing configuration.
# routing.py example that will be discovered
from channels.routing import URLRouter
from chanx.routing import path, re_path
from myapp.consumers import ChatConsumer, NotificationConsumer

# Important: name this variable 'router'
router = URLRouter([
    path('chat/<str:room_id>/', ChatConsumer.as_asgi()),
    path('notifications/', NotificationConsumer.as_asgi()),
])
Connection Panel
The connection panel allows you to:
View the complete WebSocket URL
Manage path parameters for endpoints with URL parameters
Add authentication headers or query parameters
Connect and disconnect from the WebSocket
For endpoints with URL parameters (like room_id in the example above), you'll be able to enter parameter values before connecting.
Message Composer
The message composer provides:
A JSON editor with syntax highlighting
Example message templates based on your consumer's message schema
A "Send" button to transmit the message
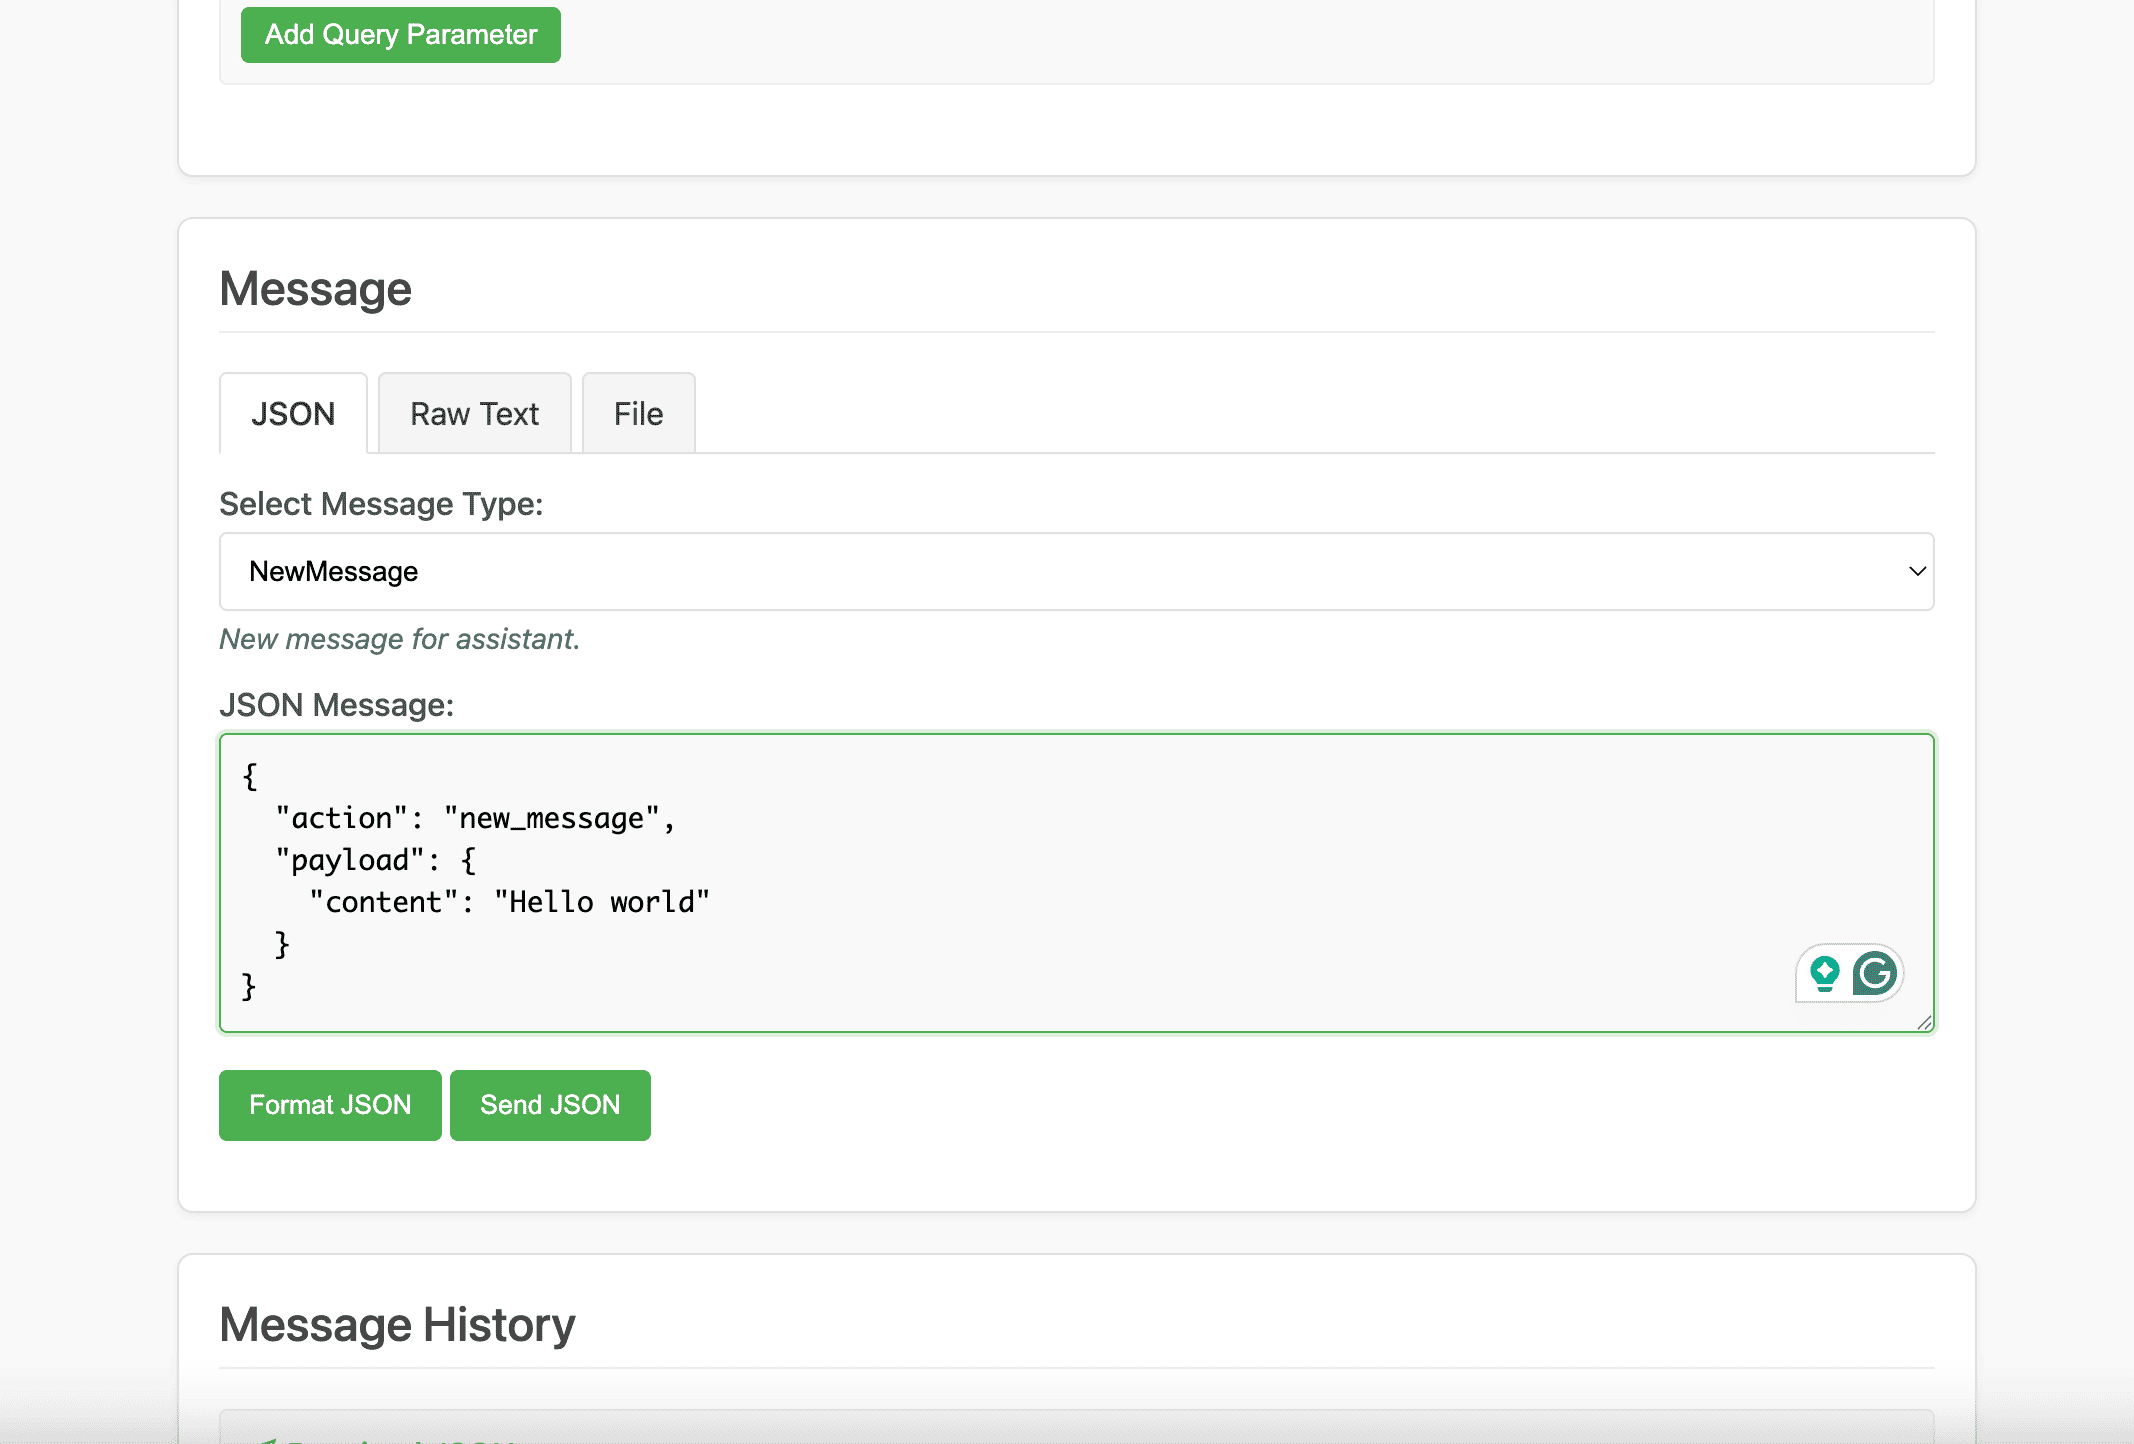
Example messages are automatically generated from your consumer's message schema, helping you send correctly structured messages.
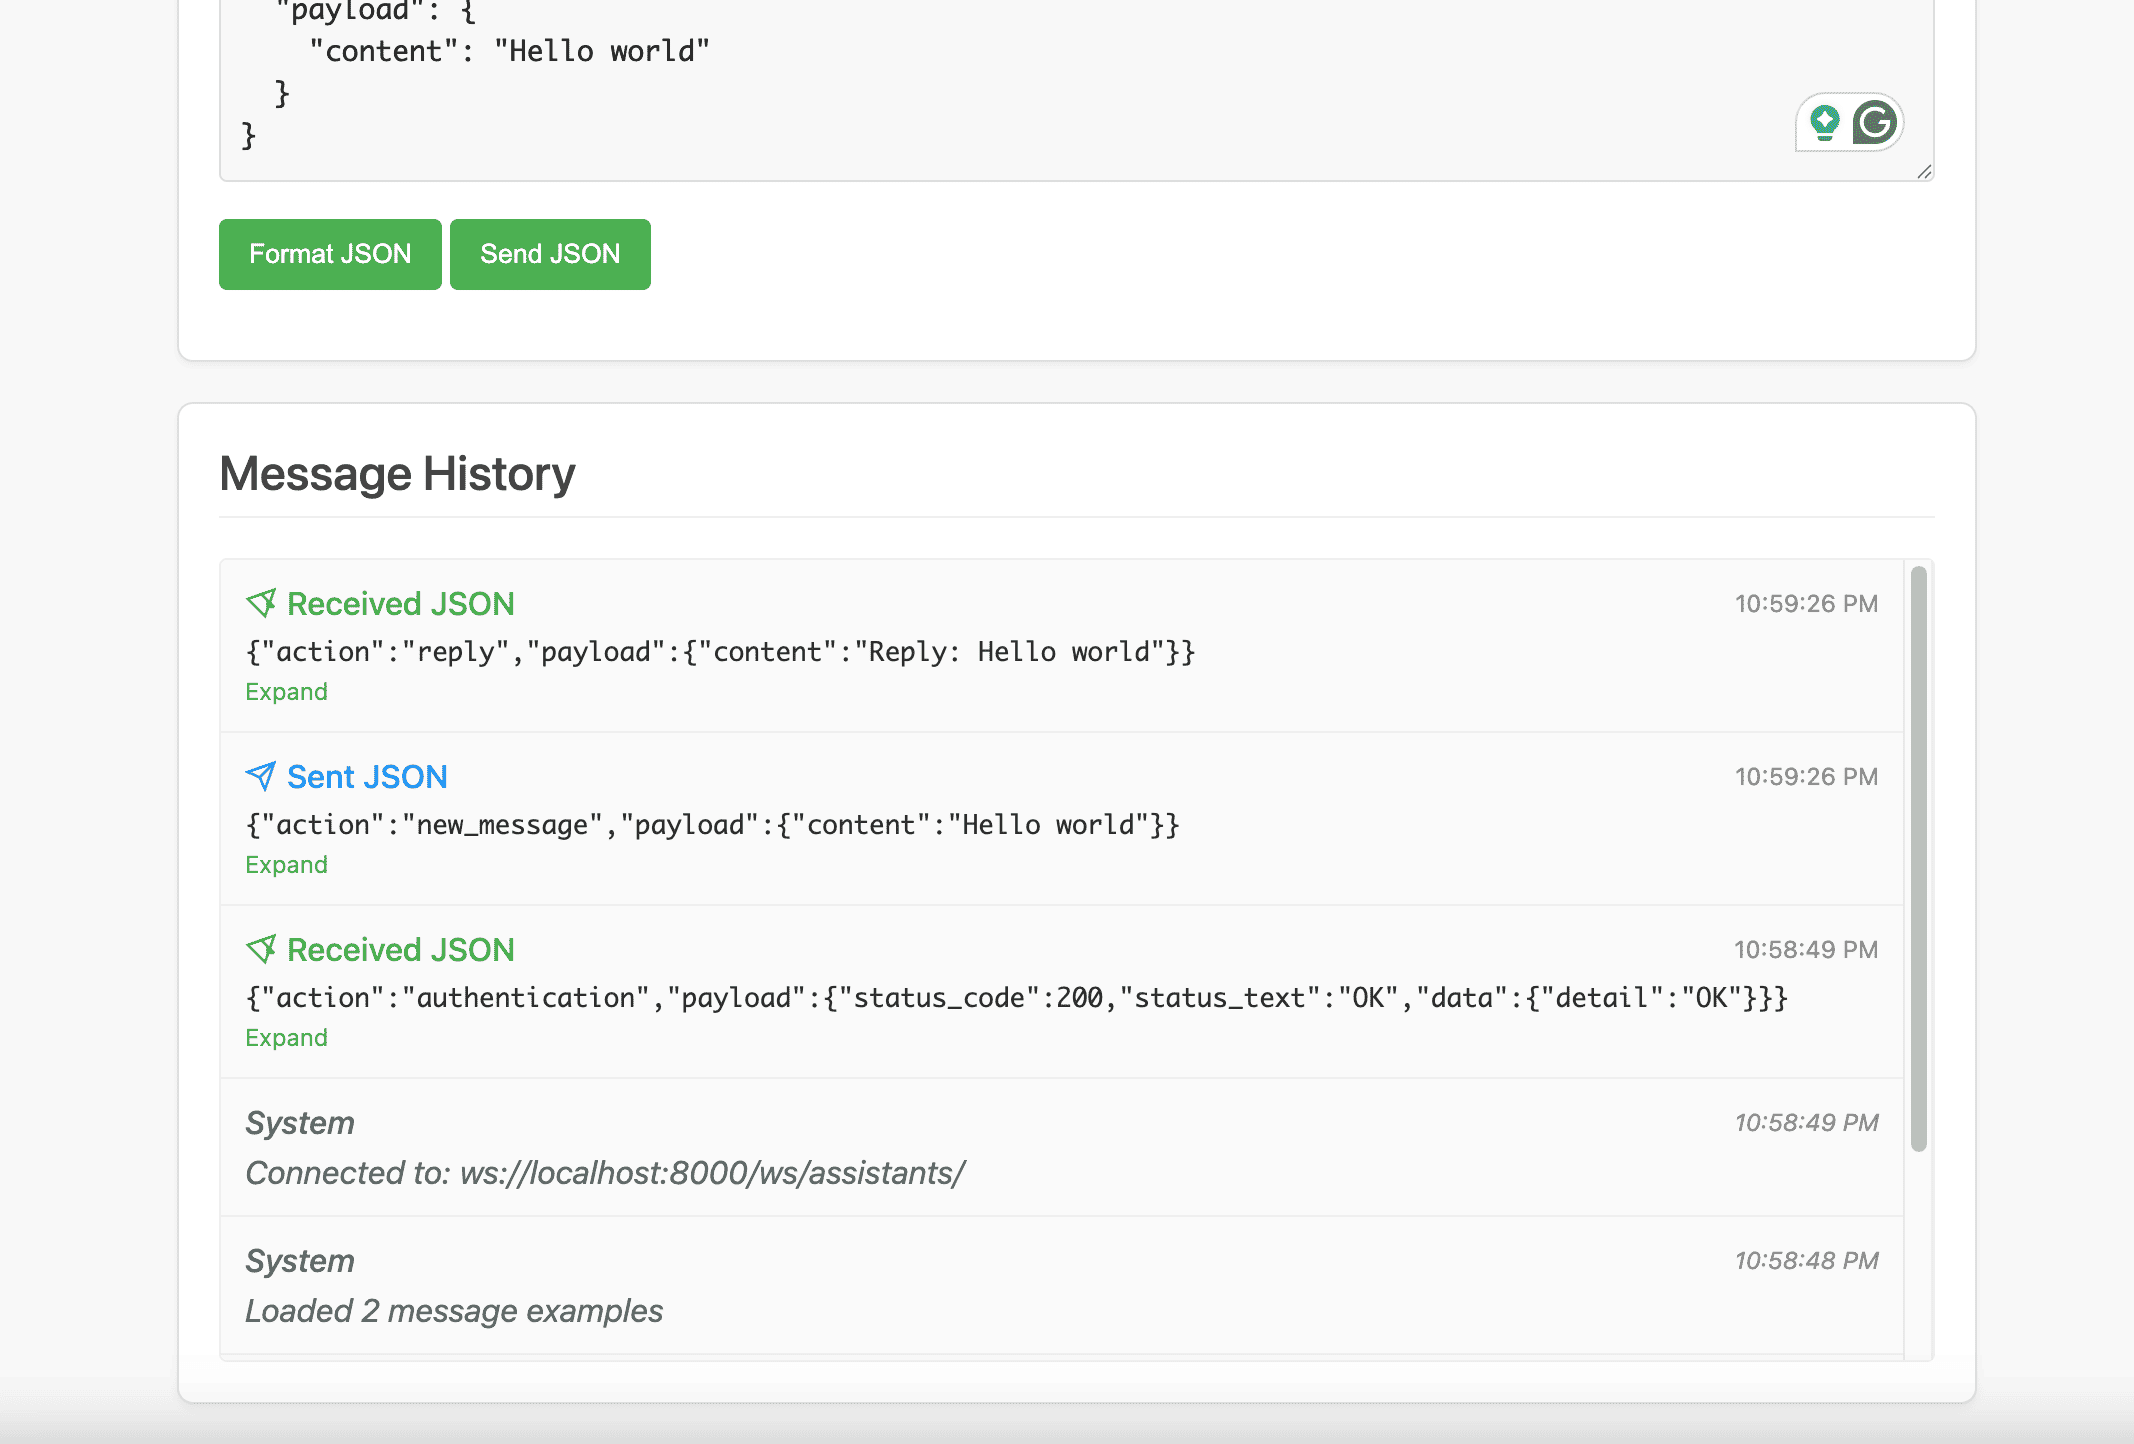
Message History
The message history panel shows:
All sent and received messages in chronological order
Message direction (sent/received)
Formatted JSON with syntax highlighting
Timestamps for each message
Authentication Testing
The playground supports testing authenticated endpoints through:
Cookie-based authentication (using your browser's cookies)
Query parameter authentication (for token-based auth)
For example, to test a token-authenticated endpoint using query parameters:
Click the "Query Params" tab
Add a parameter with key "token" and your token as the value
Connect to the WebSocket
Since browsers don't allow custom headers for WebSocket connections, cookie-based authentication is the most reliable method for testing in the playground.
Generating Example Messages
The playground automatically generates example messages based on your message schema:
from typing import Literal
from chanx.messages.base import BaseMessage
from chanx.messages.incoming import PingMessage


class ChatMessage(BaseMessage):
    """Send a chat message to the room."""
    action: Literal["chat"] = "chat"
    payload: str


class TypingMessage(BaseMessage):
    """Indicate user is typing."""
    action: Literal["typing"] = "typing"
    payload: bool = True


# Define a union type for the incoming messages
ChatIncomingMessage = ChatMessage | TypingMessage | PingMessage
For the consumer using this schema:
class ChatConsumer(AsyncJsonWebsocketConsumer[ChatIncomingMessage]):
    # Message schema is specified as a generic parameter
The playground will generate these example messages:
// ChatMessage example
{
    "action": "chat",
    "payload": "Sample message text"
}

// TypingMessage example
{
    "action": "typing",
    "payload": true
}

// PingMessage example
{
    "action": "ping",
    "payload": null
}
These examples help you understand the expected message format and quickly test your endpoints.
Security Considerations
The WebSocket playground should be used cautiously in production environments:
Disable in Production: Consider disabling the playground in production
Restrict Access: If enabled in production, use authentication to restrict access
CORS Settings: Be aware of your CORS settings when using the playground
Sensitive Data: Avoid sending sensitive data through the playground
To disable the playground in production:
# urls.py
from django.urls import path, include
from django.conf import settings

urlpatterns = [
    # ...
]

if settings.DEBUG:
    # Only add playground URLs in development
    urlpatterns += [
        path('playground/', include('chanx.playground.urls')),
    ]
Or restrict access with a decorator:
# Custom playground URLs
from django.urls import path
from django.contrib.admin.views.decorators import staff_member_required
from chanx.playground.views import WebSocketPlaygroundView, WebSocketInfoView

urlpatterns = [
    path(
        'admin/websocket/',
        staff_member_required(WebSocketPlaygroundView.as_view()),
        name='websocket_playground'
    ),
    path(
        'admin/websocket-info/',
        staff_member_required(WebSocketInfoView.as_view()),
        name='websocket_info'
    ),
]
Testing Different Authentication Methods
The playground has been designed to work with browser constraints regarding WebSocket authentication:
Session Authentication: Works automatically with your browser's cookies
JWT in Cookies: Store JWT tokens in cookies for easy testing
Query Parameters: Add tokens or other authentication data as query parameters
For example, to authenticate with a JWT cookie:
Log in through your regular application interface
Navigate to the playground (cookies will be included automatically)
Connect to the authenticated endpoint
For query parameter authentication:
Click the "Query Params" tab in the Connection panel
Add your authentication parameter (e.g., "token")
Connect with the parameter included in the WebSocket URL
Multiple Connections
You can open multiple playground tabs to test:
Group messaging between different clients
User-to-user messaging
Broadcast functionality
Simply open the playground in multiple browser tabs, potentially with different user sessions, and connect to the same WebSocket endpoint.
Next Steps
Authentication - Learn more about WebSocket authentication
Messages System - Understand message formats and validation
Testing - See how to automate WebSocket testing